Creation Station - a gift for the creative child
I made this Creation Station for my 4 year old niece who loves art and making things. This would work for any age though.
I bought:
1 x Foolscap filing box (they cost maybe $1)
1 x pack of A4 coloured paper from the $2 shop
1 x pack of A4 coloured card from the $2 shop
a pack of envelopes
2 x craft punches that were on sale for $2 each
1 x pack of gel pens for $2
Stick-on gems or stickers - $1
total cost - no more than $12
I used:
a variety of scrapbooking paper
ribbon
PVA glue
craft punches
My Cuttlebug and embossing folders
recycled boxes and tins
a craft knife or guillotine if you have one
adhesive spray

Method:
- I covered the plain white office filing box using a variety of scrapbooking paper and ribbon.
- I cut the A4 packs of coloured paper and card into A5 sizes.
- I folded the card to make A6 greeting cards.
- I embossed some of the coloured paper using the Cuttlebug.
- The rest of the coloured paper was left plain.
- I created labels using strips of paper to wrap around each pack and wrote ideas for use on the labels.
- I decorated recycled boxes and tins using a variety of scrapbooking paper.
- Using my craft punches, coloured paper, old wrapping paper, and colourful pages of magazines, I punched out a variety of butterflies, hearts, and flowers and put them in the recycled tins to be used as embellishments.
Album / Journal
I created this for my sister who wanted a baby album for her daughter. This would make a great gift for any new parent, but it doesn't have to just be for baby photos. This could be made as a travel journal, a meditation journal, a holiday album... anything you can think of that relates to the person's particular interests.
I bought:
1 x A4 visual diary, $7
Total cost: $7
I used:
PVA glue
Scrapbooking paper, tissue paper, serviettes
Stamps
Acrylic paint
Gloss medium to dilute the paint into a glaze (you don't have to do this, I just wanted to colour the paper).
Ribbon
I began by painting the pages with diluted paint, and let them dry.
Then I decorated them using a variety of papers and stamps.
This was quite a time consuming project, because you can only work on one page at a time if you need to let them dry - it is not something you want to start in December if you want to finish it in time for Christmas. Pages do not need to be painted however - you could complete this project quite quickly if you were to just decorate using papers and stamps.

I found that adding decorative papers to the pages, made the book rather bulky. I ended up removing quite a few unused pages from the back of the book, to make the book lie flat.
I covered both the front and back covers of the book, and glued a long length of ribbon along the back cover, to be tied up at the front.
Recipe Album
For the foodie in the family, or the person who simply loves to collect recipes from magazines. Or create one for the person who is about to leave home and go flatting. Ideal for university students!
I made this album using an old unused A4 folder that I had lying around, but they are cheap to buy. Alternatively, you could use a visual diary as above.
I decorated the folder using scrapbooking paper and chipboard letters that I had bought previously on sale and had been wondering what to do with.
If making this as a gift for someone else, you might just like to decorate pages using stamps and paper, ready for them to stick their collection of cut-out recipes into. Or you might like to present them with a mix of pages, some with recipes already stuck in, and some blank pages.
You could use coloured paper (you can get packs for $2 at the $2 shop) or you could buy a ream of plain white office paper to decorate for about $6.
If making this using a ringbinder, you might like to purchase a pack of plastic sleeves to protect the paper - you can get a pack of 100 for a few dollars from the local stationery shop.
Organiser / Memo Board
 For the person who needs a bit of help with remembering things. You could make this however you like - I added a note book (useful for creating shopping lists as I run out of items in the kitchen that I can then tear off when I go shopping) and a blackboard for making notes. You can find these little blackboards in stationery shops and Looksmart. Or you could paint half (or all) of the board in blackboard paint.
I bought a wooden placemat from Mitre 10 for around $2. You could also adapt this idea onto a clipboard. I simply decorated it using a variety of decorative paper and embellishments, and glued on a notebook ($5 from Whitcoulls) and a mini blackboard. To make the pen-holder, I wrapped a strip of card around a pencil, used double sided tape to attach it together to make a roll, and hot-glued it to the the board.
You could adhere magnetic strips to the back so you can stick it to the fridge. I used 3M adhesive 'hooks' to adhere it to the wall.
Bookmarks
 For the avid reader in the family. I used my Cuttlebug to create the tag shapes. If you don't have a Cuttlebug, you could always cut your own using a craft-knife and ruler. If you have a friend who is into scrapbooking or paper crafts, see if you can get together and have a craft day where you can use their tools. Once I had cut out a number of tags, I then decorated them using decorative paper, old wrapping paper, pictures cut out of old-school encyclopaedia's (which I had bought for 20c), stamps, and lace. You could attach a ribbon or piece of thread to the top and thread some beads through to finish it off.
You could adapt this idea and make a gift-set of greeting cards and matching envelopes. I decorated a recycled tin to put the set of cards into. Buy a pack of card from the $2 shop and a pack of envelopes, fold the card into greeting cards, and decorate.
Buying Gifts: Charity Shops
I prefer to trawl around charity shops rather than trudge through over-populated shopping malls with all its bling and glitter designed to make you part with your hard earned cash. I find shopping malls, especially in December, very stressful. The last time I was in a shopping mall in December was 4 years ago. Whereas charity shops offer a completely different shopping experience. You never know what you will find in charity shops, and we have got lots to choose from in Auckland. Sometimes charity shops even have sales, so you get a real bargain.
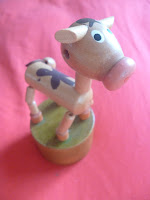
These beautiful hard cover books were only $1 each at the St Vincent De Paul charity shop in Onehunga, along with the paper backs which were also $1 each.I used to love these old fashioned toys which bend when you push the bottom of them. I found this little toy for $1 at the Salvation Army shop in Avondale. Little things like this are ideal stocking fillers.

I always look out for games in good condition when I go to charity shops - Cluedo, Scotland Yard, Trivial Pursuit, Dominoes - games that provide whole family entertainment, are fun, educational, and don't go out of fashion - board games tend to stand the test of time, and you can get them for $5 instead of up to $70-80 brand new.
This particular game was only $3, and the Salvation Army shop in Onehunga were having a half price sale, so I only paid $1.50 for it!
Take advantage of clearance tables and sales during the year.

I bravely ventured into a mall earlier this year, looking for a particular children's book. Whitcoulls happened to have a clearance table, and everything was $2! So I bought a number of these fabulous kits, for Christmas presents, for school, and to donate to the Salvation Army's Christmas present collection. For $2 each, Christmas (and birthdays) for the kids is sorted and I don't need to stress about what to get them - now I only need to decide who to give what to!
I hope that this helps to give you some ideas and inspiration to make quality yet affordable gifts.


