
I know there are a lot of tutorials on how to make these needle-felted angels, and I am sure I learnt from a tutorial on Twig & Toadstool's blog a few years ago, but I cannot find it. So here is one. I hope it is simple and straightforward enough. These angels are not complicated to make and do not take long to make once you have mastered the basics.


You will need some felting needles, and a pad to work on. You can either use a sponge pad (car wash sponges work well) or a special brush pad which you can find at specialty craft shops.
You will also need wool roving, which is carded, unspun wool. Sheeps wool is best to use - goat or merino is too fine to use and doesn't needlefelt well.
Pull off (don't cut!) a length of wool roving. The pen is there to give you an indication of size. The longer the wool, the bigger the angel/fairy will be. Pull off a smaller length of roving for the arms.

Tie an overhand knot in the middle of the longer length of wool roving... the knot becomes the head of your angel.
Take the smaller piece of roving and roll into a sausage like length between your palms. Press hard and rub rapidly back and forth to create a sausage shape. This is the start of the felting process.
Then place the arms on your mat, and stab with your felting needle, using an up-and-down motion. Go up and down the arms, and turn the arms over as you go - remember you are felting a 3D object. As you felt, fibres will be pulled through to the other side, and it can become a bit 'fluffy' with fibres sticking out. Roll it firmly between your hands again and this will felt the loose fibres back into the arms.

Take your roving with the overhand knot in the middle. Open it up and slide the arms underneath the knot, so the remaining wool hangs down either side of the arms.
Take a very thin strand of wool roving and twist it slightly. Begin wrapping the thin strand around the base of the overhand knot to create a head shape. You don't need to tie it off - just wrap it around and it will stay. Wool is very strong. You might like to stab it slightly with a felting needle to hold it in place.

Then take another thin strand of roving to wrap around the waist and over the arms. This will secure the arms to the angel.
To do this, find the middle of the length of the strand, hold it against the angel's back with your thumb/finger and wrap it once around the waist. Work with one side of the strand at a time. Bring it diagonally from the waist up to the opposite shoulder, and back down the other side on a diagonal. Do a half-wrap around the waist and bring it up on a diagonal to the other shoulder, and back down to the waist. Keep repeating until you reach the end of the strand; then repeat with the other end of the strand. You do not need to tie it off.

If you want to, you can wrap a little bit of roving around the 'wrist' to create a hand shape. I used to do this but I don't any more. I find it easier just to roll the arms into a sausage shape.

This is the base of your angel.

To dress your angel, lay the angel onto your mat.
Pull off a length of wool roving in the colour of your choice.

Fold the wool roving in half and place onto your angel. You can do this a number of ways:
1 - Place the fold over your angel's shoulder, so that it covers the front and back; and stab into place;
OR
2 - Place the fold underneath the neck of the angel, so that you are just doing the front; and then do the same on the back;
OR
3- Place the fold on her waist so that you are creating the skirt, and use a different colour for her top.

Once you have stabbed the top into place, you can lightly stab the roving onto the skirt. You might like to add a second colour onto her skirt. Play around with ideas and colours.

When you have done her top and skirt, it is time for her hair.
Choose some roving for your angel's hair, and pull of a suitable length.
Place the head in the middle of the length of hair, and begin stabbing into place.


To add flowers to her hair, take a small length of roving, and wrap around your little finger. Pull off and put into place on her hair. Stab into place. Get a tiny piece of another colour and roll into a little ball. Place in the middle of the flower and stab into place.


This angel has flowers spiralling around her head.
The flowers on her dress were done in the same way as described above. I lightly felted some green roving together, and stabbed the flowers into place on the green roving.
Then I attached the 'field of flowers' to her dress.

This angel has plaited hair, tied off with silver thread.
Play around with embellishments: different types of yarn, embroidery thread, Angelina, ribbons feathers. There are no right or wrongs - just have fun and try out ideas.
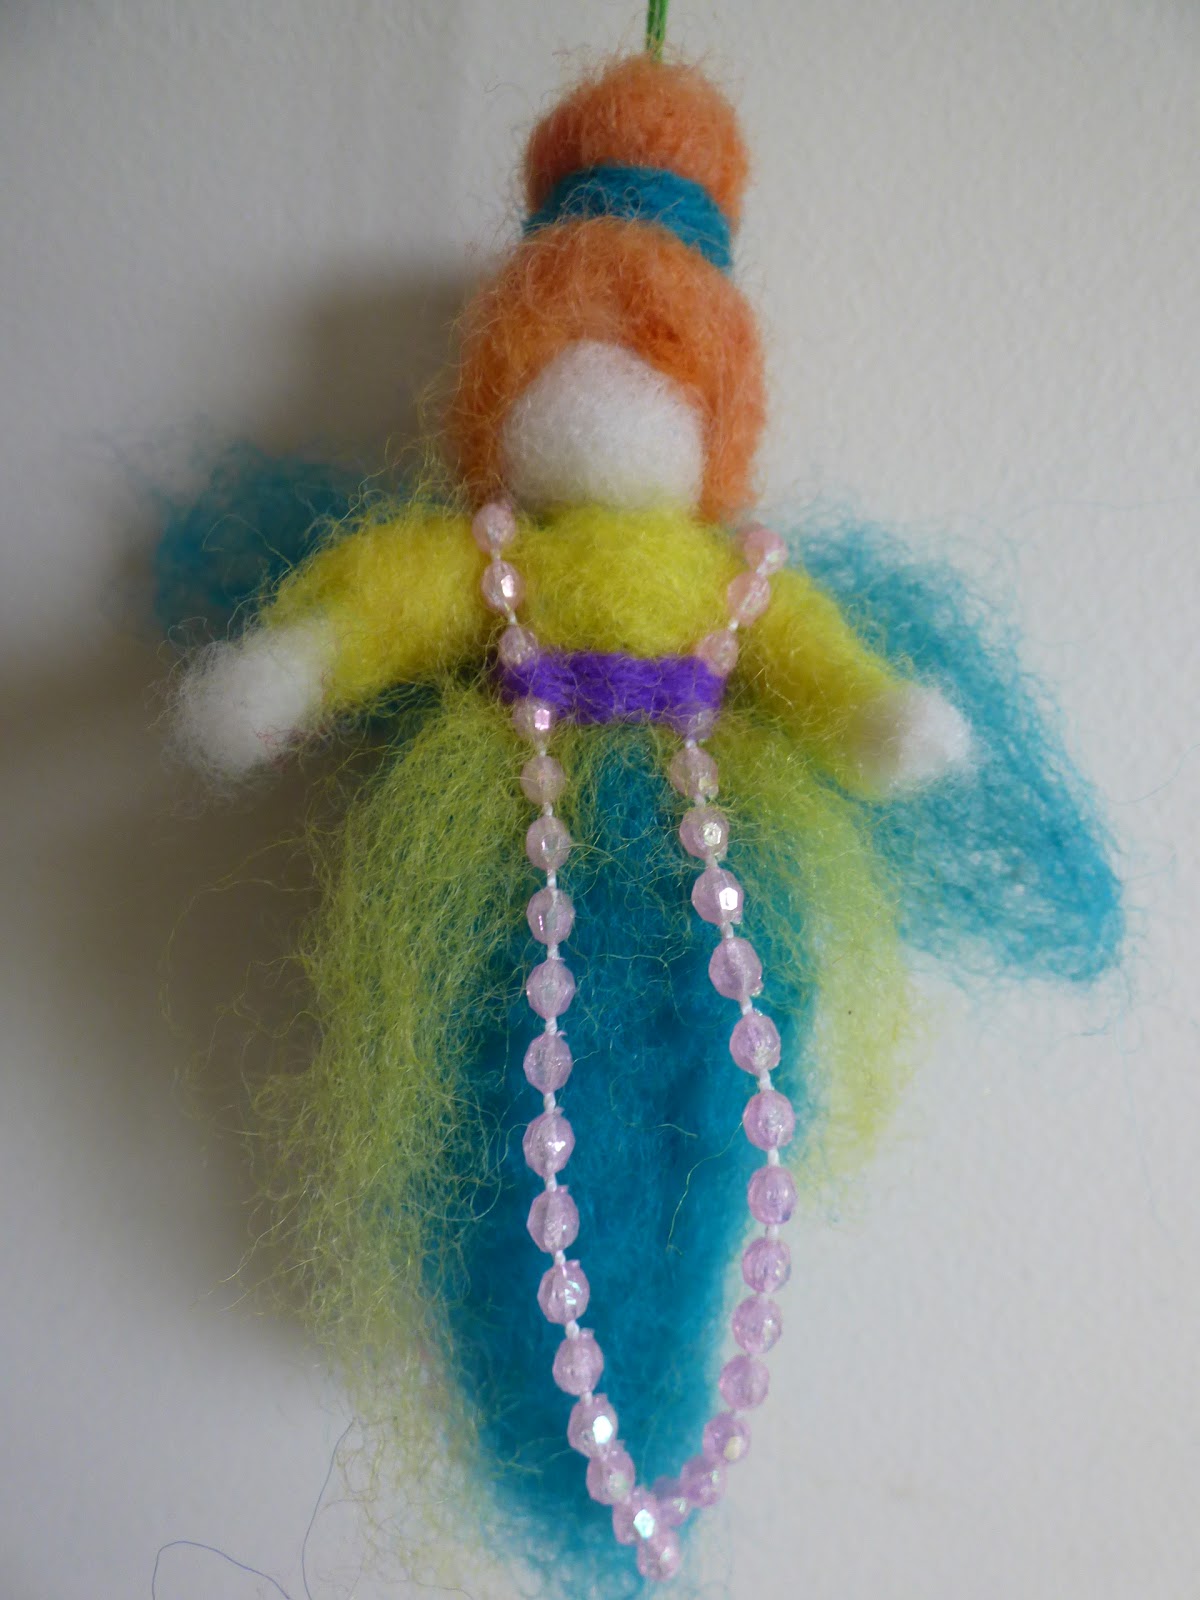
To attach embellishments such as feathers, ribbons or beaded strings as above, I wrap wool roving around it (as you can see in the above photo) and stab the roving into place. This secures your embellishments. You could try sewing them into place, too.

These flowers were done the same way as detailed above - wrap a small strand of coloured roving around your little finger, pull off and stab into place. I attached the flowers to the lavender coloured roving before putting it onto the angel. Then I wrapped a thin ribbon around her waist and tied it off at the back.

My 100 Days Project so far... 100 Days Project: Angels for Babies (100 Days Project website link)


