Tuesday 26 December 2017

Christmas Decorating in the Nursery

I recently purchased a little nursery in a wooden display box at my local Op Shop (or thrift shop) for $10. It is very cute, and came with a little cot, rocking horse, a mat, chest of drawers, change table, miniature toys, and miniature bedding. But it needed a little festivity added for Christmas. So I spent a happy afternoon creating miniature decorations for the nursery.


The wreath was made from half a green pipecleaner twisted around into a little circle.

To add the detail, I threaded beads onto cotton:
I wrapped the beads & thread around the pipecleaner wreath, and tied it off at the end.

I cut out pictures from a book of Christmas Scrapbooking Paper, and glued them on gold card.

The Christmas Tree wall decal was a basic tree shape cut out of green card; and embellished with stick-on gems.

To make the stocking, I cut out two stocking shapes out of a scrap of red felt, and two small rectangles out of white felt to go around the top. I layered the the white felt over the top of the stocking and sewed a row of sequins along. I then did the same with the other side of the stocking, and sewed the two sides together.

I have been playing around trying to make ballerinas out of yarn-wrapped pipecleaners and fabric scraps. I put one of them in the nursery to be "Mum", and gave her a little baby to hold.


The robin was cut out of a book of scrapbooking paper and glued onto gold card.


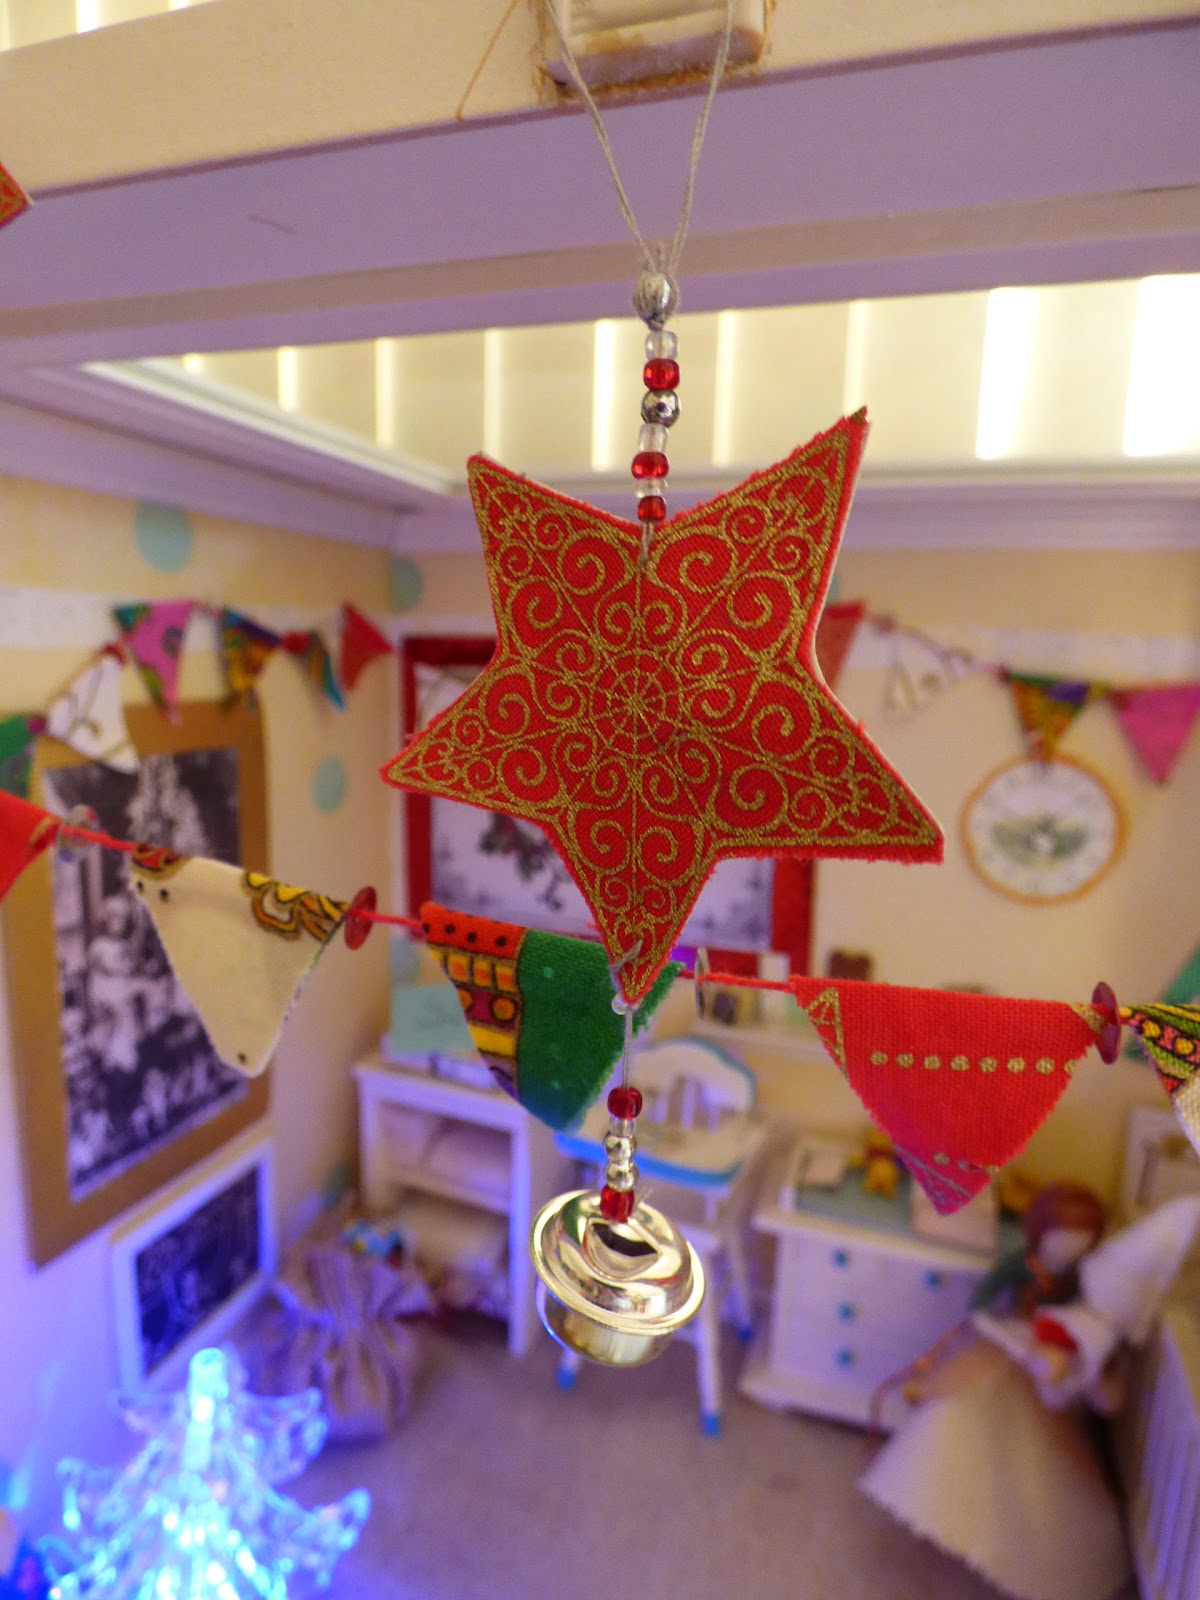
The stars were cut from fabric and glue onto card to make them stiff. When dry, I pierced a hole through the star with a needle and thread, and threaded some beads on, leaving a loop for hanging.


The bunting was made from folding fabric scraps in half and cutting triangle shapes out. I created a paper template so that my bunting would all be the same size.

When I had cut out lots of folded triangles (or diamonds, when unfolded), I cut a length of thread to go around the nursery, and began gluing the diamond pieces over the string to create the bunting.

A letter to Santa to be sent in the overnight mail.


Click on the link to see all my other Christmas Decoration tutorials
Click on this link to see all my other craft tutorials and posts

Monday 25 December 2017

Winter Wonderland Terrariums

I had bought these glass terrariums last year to make Christmas decorations with, but I just didn't know what to put in them. I have been on the lookout for a little plastic reindeer to go in one, but they seem to be impossible to find. I finally looked in Toyworld, and sure enough, they had plastic deer toys, perfect for my glass terrarium!
 To make the winter woodland, I began by spraying the inside of the terrarium with fake snow.
Then I put in a layer of green wool fibre (roving) and put a little white sparkly Angelina fibre over the top.
I gathered up a few natural resources, such as a gum nut, an acorn, and some moss, and put them around the inside.
Then I put the deer inside.


To make the arctic wonderland, I began by spraying the inside of the glass terrarium with fake snow. (This needs to be done outside - or in a ventilated area).
I spread a little bit of white wool fibre (roving) over the bottom.
I laid out a little bit of white sparkly Angelina over the wool fibre.
The arctic is now ready for the polar bear cub!

The deer and polar bear cub came from Toyworld.
The glass terrariums were bought at Look Sharp!

Decorated Clipboards & Noticeboards

These decorated clipboards make super affordable, attractive and practical gifts, that can be easily personalised for that extra special touch.  They can be used for holding shopping lists, To Do lists, important pieces of paper, letters, phone numbers, notepads, reminders and notices from school. I am sure you can think of a million other uses for them too!


 You will need:
Clipboards (I picked up mine from a local Savemart Store - the small ones were $1.50 each, and the large ones were $2 each).

Strong craft glue
Craft knife
Sandpaper
Pencil
Ruler
Decorative Paper
Ribbon
Embellishments


Start by sanding your clipboards. I used a grade 2 sandpaper to create a rough edge for the glue to hold onto. The first time I made these, I didn't sand them - and the papers peeled off.


Sort out and co-ordinate your decorative papers that you intend using. I made several groups of co-ordinated papers before choosing which ones to use.


I found the clipboards had slight variations in size, so I drew around the clipboards onto the paper to get the sizes right, and cut out using a craft knife.


 Measure where the top of the clip is on your clipboard, and transfer the measurements onto the paper, so that the paper fits neatly on either side of the clip.

Spread glue over your paper and position on the clipboard. Use a brayer, a sponge, flannel, or a bone folder to smooth out the paper over the glue.

To make the cooking themed clipboard above, I used a green circle patterned paper as my base, with a lemon patterned serviette layered over the top. Pictures cut out from magazines were added, along with an Apron embellishment and strawberry stickers.

Start adding embellishments such as stickers, bling, stick-on gems, washi tape, paper doilies, etc.
Mini blackboards may be added and stuck on.


A pen/pencil holder can be made by rolling a rectangle of card around a pencil or pen. Use double sided tape to secure into a cylinder shape. Use another piece of double sided tape to stick the pencil holder onto the bottom of the clipboard. It is best for pencil holders to be horizontal rather than vertical, otherwise a pencil may fall out.


You may like to add a ribbon onto your clipboard. I didn't glue the ribbon onto the front of the clipboard, so that paper or the back of a notepad can be slipped through and hooked over the ribbon. If adding ribbon, you will need to make the ribbon approximately three times the width of the clipboard. Begin by gluing it across the back of the clipboard; take across the front; and glue down over the back again.


When I first bought the clipboards, I peeled the label off the back, and it made a rather unsightly mark. I simply covered the back with a piece of patterned paper to hide it. I placed the clipboard straight onto the paper and cut around it with the craft knife rather than measuring and drawing and cutting.


This one was created using a wooden placemat, rather than a clipboard. I used decorative papers, and stuck a notepad on one side (it is removable) and a blackboard on the other.  I have it in the kitchen and is great for jotting down items on our shopping list as I think of them or when I use the last of something. It is also handy for phone messages or any time I need to find a piece of paper and a pen.

It has one pencil holder for the blackboard, and one pen holder for the notepad.


Check out my other craft tutorials here.


Playing with Felt

I enjoy just being able to play around in my craft room. I had borrowed this beautiful book on making pincushions from my mum, so I had a go at making some... which led me to adapting ideas and creating a little trinket box. I have limited embroidery skills as I have not done it since primary school, so I have just been teaching myself and trying out some ideas. I find that ideas lead onto further ideas and more play. Some of the ideas work, and some don't.

Felt Heart Decoration

I cut out some basic heart shapes: 2 x same size, and 1 smaller heart; and some felt flowers and tiny circles for the centre of the flower.
I laid the smaller heart and felt flowers over the larger heart then sewed them on.
I then sandwiched a ribbon in between the two white heart pieces and sewed it together to finish.

Caravan

I saw the felt caravans on Pinterest. To make the caravans, I cut out two caravan shapes out of felt; a fabric rectangle for the door, and smaller squares/rectangles for the windows. I then traced around the top of the caravan to get the shape for the top piece, and cut out of fabric. I added ric rac for details, and a button for the wheel.  

Needlefelted Toadstools

I tried making miniature needlefelted toadstools in a macadamia nut shell. Still deciding on what to do with it. Perhaps it could go in an indoor fairy garden. 

Needlefelted Hearts

I just made basic needlefelted hearts (The Magic Onions have a wonderful easy tutorial on how to make needle felted hearts. which is how I learnt). I added tiny flowers to the hearts once I had finished. Flowers can be added by wrapping a tiny bit of wool roving around your little finger, pull off and stab into place. Get an even smaller piece of roving in a different colour; roll between your fingers to create a ball; and stab in the centre of your flower.

 Pincushions

I had some old teacups in the cupboard which are pretty but I never use; so I repurposed them with the help of a gorgeous book on making pincushions. I added ribbons, felt flowers and beads to decorate.


There was a felt pincushion in the book which was rather cute, so I had a go at making..


Trinket Box

After making the felt pincushion above, I wondered if I could adapt it to create a little box. This was a bit of trial and error and figuring things out as I went.
I haven't done embroidery in a very long time, but it was fun to pick it up again and decorate the little trinket box. 

I added a lid which was also embellished. The lid is sewn on so that it lifts up.


Kadinsky Inspired Pouches

By this time I was on a roll, and I wondered if it would be possible to make a little purse or pouch. I cut a rectangle of felt, and worked out where to put the embellishments.
I cut out a variety of circles of different sizes and colours, and layered them on top of each other, finishing with a bead. I then decided to cut out some leaf shapes, and sewed them on.
I folded the bottom part of the felt up, and sewed along the sides, leaving enough room at the top to be able to fold over like a purse. I did blanket stitch across all the edges and added a button and a loop of thread to close.
The front of the pouch
The back of the pouch.


Click on the link to see all my other craft tutorials


Click here to see all my Christmas related tutorials