Showing posts with label Needle-felting. Show all posts

Friday, 21 December 2018

Miniature Felted Christmas Scenes


While I was felting miniature Christmas scenes in walnut shells recently, (see my post here to find out how to make these cute little Christmas trees in walnut shells) I decided to try making a tiny wee mouse asleep in a walnut shell, waiting for Santa.

If you are new to needlefelting, check out this earlier post here, which gives you a bit more detailed information on how to felt and what you need.

This was a project where I began to have doubts as I was felting the mouse, whether I had made him too big for the walnut shell. However, as mentioned in my last post, there is a big transformation that takes place as you continue to stab the wool and the fibres begin to felt firmly together, causing significant shrinkage, which was exactly what I needed for him to fit. The mouse took quite a bit of time to make, but finally I was able to tuck the mouse into the walnut shell, wrap him with a bit of wool roving for a blanket, added a tail, and began to think about the best way to make a Santa Stocking.
I decided to needlefelt a stocking, so I began by pulling off a small strand of red roving, rolled it into a cylindrical shape, and began stabbing. Both the mouse and the stocking took quite a bit of time to make, as they needed to be firmly felted to create the required shape and size. I had to be patient and persevere to see both the stocking and mouse take shape. I then attached the finished stocking to the bed with a needle and thread.
The next day I decided to needlefelt a kiwi asleep in a walnut shell bed. The kiwi was much easier to make than the mouse, and just required making one very small ball and one slightly larger ball (for the head and body); and a small piece of yellow roving which I rolled vigorously between my fingers to make a small sausage shape for the beak, before stabbing lightly to felt it into shape. I tucked Kiwi into his walnut shell bed, and stabbed his head, beak and body into place. I wrapped a bit of coloured roving over him for his blanket, and made a tiny pillow for under his head.

I also made Kiwi a Santa Stocking, again attaching it through his blanket with a needle and thread.
I had bought salad from the supermarket for my lunch during the week, which came in these wonderful cardboard containers. I was reluctant to throw them away, and instead used them to create these mini Christmas diorama scenes for Mouse and Kiwi.
I kept Mouse's little room plain, with just a few little adornments to make it homely. The clock is cut from a bottle cap and attached to the side of the wall. I cut out a little window in the back of the container and covered it a ribbon curtain; and drew a little family photo for Mouse to put on his wall. I edged the container with a bit of green eyelash yarn to resemble grass.

Kiwi's scene is created from acrylic felt. I drew around the cardboard container onto green and blue felt, to get the size, and cut out. I cut the green circle in half (do not cut in a straight line - create a wavy line to resemble a hilly background), and sewed the green grass onto the sky. I then measured the depth of the container and cut two strips, one green and one blue, to cover the sides of the salad bowl, sewing the strips to the circular background and connecting them to each other.


The pohutukawa tree is made from three pipecleaners twisted together, and wrapped tightly with brown roving. I cut out tiny leaf shapes from the green felt and tied them to the branches with a bit of thread. The pohutukawa flowers were made from rolling a few thin strands of red roving between my fingers to create a tiny ball, felting it with a needle to hold it shape, and used thread to run through the middle of the flower to stitch to the leaves. The pohutukawa tree has roots to help hold it upright, which are stitched onto the grass to secure it; while the branches twist upwards and out.
 To see all my other Christmas tutorials and posts, please click on the link.
To see all my other craft posts, click on this link here.

Needle felted walnut shells

Christmas time is such a magical time of year for me, and I love to decorate and make my home look a bit special. This year I have shifted cities and am currently staying at my parents while I find somewhere to live. All my Christmas decorations are in storage, so I have been busy creating decorations to create a little festive display in my room.
All my craft supplies are also in storage, however I discovered a wonderful little sewing shop which has a fantastic range of wool roving. I felt like a kid in a candy shop as I chose colour after colour, and couldn't wait to come home and start felting.

If you are new to needlefelting, check out my earlier tutorial on needlefelting here, which gives you a bit of information on how to needlefelt, and what you will need.
A while ago on Pinterest I came across thes amazing miniature felted scenes in walnut shells. I wasn't convinced I could do them, but mum and dad had walnut shells around their garden, so I thought I would give it a go, although on a less elaborate and less detailed scale.
I began by soaking the walnut shells in boiling water, then dried them out in the oven on low, to clean them. The walnut shells made the kitchen smell quite strongly, so I had to open windows and doors to air it out!

I had sketched out a few ideas on paper before starting. I like putting my ideas on paper as this helps me to clarify ideas, work through any problems, figure out the best way to do it, and it also allows me to generate further ideas. I always keep a little notebook and pen in my bag, so whenever I have to wait somewhere, whether it is at the doctor's or at the Fish & Chip shop, I get out my notepad and begin sketching and writing down ideas.
When the walnut shells had cooled down, I began. I rolled up a small length of wool roving and pressed it into the walnut shell for the base. I then pulled off a small length of green wool and rolled it up into a cylinder shape. I tried to make it conical but it was more cylindrical. However, this can be fixed once you begin felting, by felting firmly around the top to shrink it, and by adding more wool around the bottom to add shape. I started stabbing the wool in place, and once it was at a stage where it could start to hold its shape, I began to sculpt a more conical shape with my felting needle*. I then rolled up single strands of coloured roving between my thumb and forefinger to create tiny balls which I stabbed into place around the tree**.

The second tree I made, had to be able to stand up in a lopsided walnut shell, so I had to make sure that I had the angles right for it to be upright in an angled base. To decorate this tree, I wrapped a thin strand of yellow roving around and around the tree from the top to the base, and stabbed it into place with my felting needle.
When I was happy with my tree, I felted it thoroughly into the woolly base in the walnut shell, being careful not to damage the needle on the hard shell.
*When needle felting, the more you stab and felt the wool, the more your item begins to shrink and firms up. This is because the felting needle has barbs on it which grabs the natural hooks in the wool and brings the fibres together. The more you stab it with your needle, the more tightly the fibres mesh together. This is why there is always shrinkage when felting. Quite often when felting, I find that my finished product looks nothing like it did when I began, and it is easy to have a moment or two of doubt during the early stages about your project and a dreaded feeling that it is not working. Just keep going, keep stabbing, and have faith that it will turn out how you want it to. Felting needles are wonderful sculpting tools that can transform wool into whatever your imagination can dream up. You just need to persevere and have faith throughout the early formation period.
**If you want to add more wool to your item, make sure you add it while the fibres are still loose. I find that I am unable to attach wool to objects that have been felted too much; this is the case whether I am adding shapes such as arms; details such as hair and eyes; or extra roving for more shape and thickness. Keep fibres loosely felted where you will be adding to it. Once you have attached all your details, then you can begin stabbing your project firmly into shape.
To see more of my Christmas related crafts and tutorials, please click on the link here.

To see my other craft posts and tutorials, please click on this link here.

Saturday, 14 July 2018

Felted Bookmarks

 These felted bookmarks make reading a pleasure, and were fun to make. They also make great gifts for readers.
 I was given a bag full of "accidentally felted" merino wool. My mum's friend was dying her wool green and it accidentally felted, creating long strips of pre-felted wool.
 It was a very large bag full of it, and I have been wondering how to use it. 
But one morning when playing around with ideas in my head in those moments before you fully awake, I thought I could make bookmarks with them.

I wet felted the strips using hot water, dishwashing liquid, bubble wrap and a sushi mat. It didn't take long to fully felt, because it was already partially felted.

I decided that I couldn't use acrylic felt to make flowers for merino bookmarks, so I also wet felted some coloured wool roving to create flat sheets for making embellishments.
Flat sheets of felt for embellishing the bookmarks.
 I also tried wet felting designs onto the merino strips during the felting process, which turned out quite well.
 Having a pile of little bookmarks to play with and decorate and embellish meant I could explore my beginning embroidery skills, and decorate with beads and flowers.
I used a large turquoise felt circle, a small yellow felt circle, and a bead, to create a flower for this bookmark.

These bookmarks are so easy and fun to make as there are no rules. You can cut out uneven circles, layer colours and different sizes on top of each other, and add beads. Play around with broken jewellery, buttons, and embroidery cottons. Have fun! 
They can also be turned into bracelets with the addition of a button and a loop of ribbon.

You can see all my other craft posts here.

Saturday, 10 June 2017

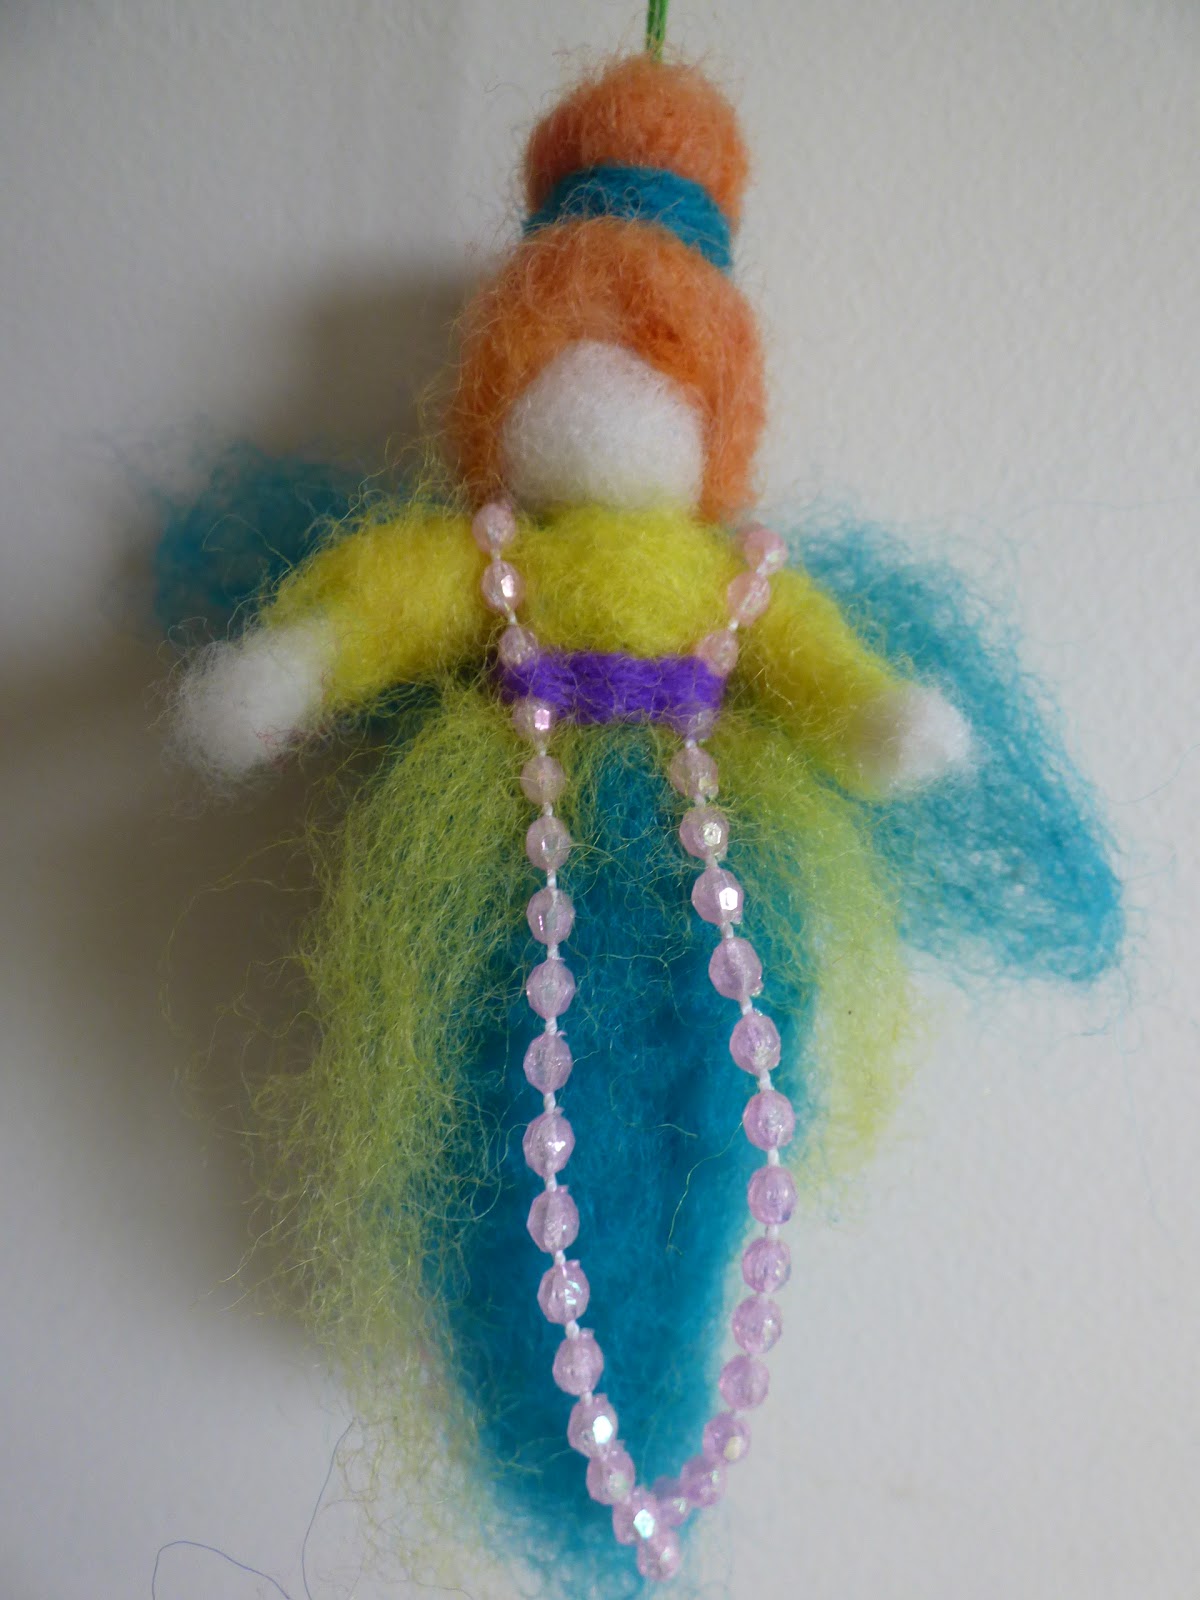
Needle felted Angels Tutorial

I know there are a lot of tutorials on how to make these needle-felted angels, and I am sure I learnt from a tutorial on Twig & Toadstool's blog a few years ago, but I cannot find it. So here is one. I hope it is simple and straightforward enough. These angels are not complicated to make and do not take long to make once you have mastered the basics.
You will need some felting needles, and a pad to work on. You can either use a sponge pad (car wash sponges work well) or a special brush pad which you can find at specialty craft shops.

You will also need wool roving, which is carded, unspun wool. Sheeps wool is best to use - goat or merino is too fine to use and doesn't needlefelt well.

Pull off (don't cut!) a length of wool roving. The pen is there to give you an indication of size. The longer the wool, the bigger the angel/fairy will be. Pull off a smaller length of roving for the arms.  

Tie an overhand knot in the middle of the longer length of wool roving... the knot becomes the head of your angel.

Take the smaller piece of roving and roll into a sausage like length between your palms. Press hard and rub rapidly back and forth to create a sausage shape. This is the start of the felting process. 

Then place the arms on your mat, and stab with your felting needle, using an up-and-down motion. Go up and down the arms, and turn the arms over as you go - remember you are felting a 3D object. As you felt, fibres will be pulled through to the other side, and it can become a bit 'fluffy' with fibres sticking out. Roll it firmly between your hands again and this will felt the loose fibres back into the arms. 
Take your roving with the overhand knot in the middle. Open it up and slide the arms underneath the knot, so the remaining wool hangs down either side of the arms. 

Take a very thin strand of wool roving and twist it slightly. Begin wrapping the thin strand around the base of the overhand knot to create a head shape. You don't need to tie it off - just wrap it around and it will stay. Wool is very strong. You might like to stab it slightly with a felting needle to hold it in place.
Then take another thin strand of roving to wrap around the waist and over the arms. This will secure the arms to the angel. 
To do this, find the middle of the length of the strand, hold it against the angel's back with your thumb/finger and wrap it once around the waist. Work with one side of the strand at a time. Bring it diagonally from the waist up to the opposite shoulder, and back down the other side on a diagonal. Do a half-wrap around the waist and bring it up on a diagonal to the other shoulder, and back down to the waist. Keep repeating until you reach the end of the strand; then repeat with the other end of the strand. You do not need to tie it off.

If you want to, you can wrap a little bit of roving around the 'wrist' to create a hand shape. I used to do this but I don't any more. I find it easier just to roll the arms into a sausage shape.
This is the base of your angel. 

To dress your angel, lay the angel onto your mat.
Pull off a length of wool roving in the colour of your choice. 

Fold the wool roving in half and place onto your angel. You can do this a number of ways:
1 - Place the fold over your angel's shoulder, so that it covers the front and back; and stab into place;
OR
2 - Place the fold underneath the neck of the angel, so that you are just doing the front; and then do the same on the back;
OR
3- Place the fold on her waist so that you are creating the skirt, and use a different colour for her top.

Once you have stabbed the top into place, you can lightly stab the roving onto the skirt. You might like to add a second colour onto her skirt. Play around with ideas and colours. 
When you have done her top and skirt, it is time for her hair.
Choose some roving for your angel's hair, and pull of a suitable length. 
Place the head in the middle of the length of hair, and begin stabbing into place.


To add flowers to her hair, take a small length of roving, and wrap around your little finger. Pull off and put into place on her hair. Stab into place. Get a tiny piece of another colour and roll into a little ball. Place in the middle of the flower and stab into place.


 This angel has flowers spiralling around her head.
The flowers on her dress were done in the same way as described above. I lightly felted some green roving together, and stabbed the flowers into place on the green roving.
Then I attached the 'field of flowers' to her dress. 
 This angel has plaited hair, tied off with silver thread.
Play around with embellishments: different types of yarn, embroidery thread, Angelina, ribbons feathers. There are no right or wrongs - just have fun and try out ideas.
 To attach embellishments such as feathers, ribbons or beaded strings as above, I wrap wool roving around it (as you can see in the above photo) and stab the roving into place. This secures your embellishments. You could try sewing them into place, too. 
These flowers were done the same way as detailed above - wrap a small strand of coloured roving around your little finger, pull off and stab into place. I attached the flowers to the lavender coloured roving before putting it onto the angel. Then I wrapped a thin ribbon around her waist and tied it off at the back.

My 100 Days Project so far... 100 Days Project: Angels for Babies (100 Days Project website link)


Saturday, 8 April 2017

Needlefelted Fairy Mobile Tutorial


I made this fairy mobile for my niece's 8th birthday. I was on a strict budget and did not have a lot of money to spend on birthday presents. But I do have lots and lots of coloured wool roving in my craft room, so all I needed to buy was wire. This mobile cost me very little money (less than $2) and a bit of time. 

You will need:  
* Wool roving - This is carded, unspun wool. Carding wool is a process that combs wool fleece and makes it usable. You probably want a variety of colours. There are a number of options if you wish to dye your own wool - my mum used to use food colouring to dye wool; Fruits, flowers and vegetables can be used to dye wool, eg onion skins, and beetroot; Otherwise, you can purchase dyes from craft shops and wool shops.
* Wire
* Pliers
* Felting Needles. These are special barbed needles that come in a variety of sizes. 
* Felting Mat or thick sponge pad.  Car wash sponges work well.

First, bend the wire into a circular shape to the size you require. I made two rounds, twisting the ends of the wire around the circular shape. 
Then get a decent length of wool roving and begin wrapping it tightly around the wire shape, until you reach the desired thickness. You want it reasonably thick, to be able to felt it using needles without hitting the wire all the time and bending your needle. Unfortunately I don't have photos of this part, as I didn't think about doing a tutorial until I began adding the flowers and details.  But you get some idea of the thickness in the photo. Once you have wrapped the wool around, put it on your felting pad or sponge, and begin stabbing it with your needle (this is a great way to get out any frustration that has been building up inside you). Use a large size needle to begin with, and use an up-and-down motion, rather than side to side (otherwise you risk damaging either your needle or yourself - and trust me, it hurts!). Try to avoid the wire as much as possible, but make sure you rotate it and felt the whole thing evenly.  Add more wool if some parts are skinnier than others.  Change to a smaller needle as the wool fibres begin to mesh together. 

 I learnt how to make angels from wool roving in an online tutorial. There are many tutorials online that show you how to make them. I just omit the wings and add a little bit more roving to the skirt to make fairies such as these. When I first began this fairy I made her arms rather short (as you can see) but I added extra wool to her arms to extend them, and you can see the difference between this photo and the photo of the finished mobile. 

Once you have felted the mobile's base, you can begin adding detail. To create flowers, get a tiny little bit of wool roving between your fingers and wrap it around your little finger to make a ring shape. Take it off your finger, squash it together onto your base, and begin stabbing it in.  
O
Once you have stabbed in the flower, you can add a centre.  Get a tiny bit of a different colour, and roll it into a little ball between your fingers. Place it into the centre of the flower and stab it in using a fine needle. I use a size 34 or 32 for fine detailing - whichever feels best.
Repeat until you have the desired amount of flowers. You can use this technique to add flowers to fairies' hair; dresses; whatever you are creating.
To create a ladybird, get a small amount of red wool and roll between your fingers to create a small ball.  Rolling it between your fingers helps prepare the wool and shape it ready for felting. Stab it into place. Get a tiny amount of black (eg 2-3 threads) and roll into tiny balls to felt into place on the ladybirds back. You will need to use a fine needle for this.  Get some more black to felt for the head and the line between the wings.
The rabbit was created by rolling a fat oval and stabbing it into shape; 2 little ovals for the ears; and a small ball for the head. It is ok if things are not perfect straight away - it takes time, and at first it often feels like it is looking like nothing you had imagined.  That is ok.  Keep stabbing, add more wool if you need to; and if it really turns bad, pull it off and start again.  
The toadstools were made by rolling fat sausages for the stalks and stabbing roughly into shape and then stabbing into place. You do not want to over felt something if you are going to attach it - you want to keep the fibres where it is to be attached, fairly loose, so that it can be felted into the attachment.  It is difficult (ie, impossible) to attach firmly felted items to something, and vice versa. When making the toadstools, you need to keep the top of the stalk loose, so that the tops can be felted on.
To create the tops of the toadstools, roll some red wool into shape and stab over the top of the stalks. You might want to wrap the red wool around the stalk, so that it is firmly attached to the toadstool. There is no right or wrong way - do what works with you, and give yourself the freedom to experiment and try things out and don't give up if it is not working straight away.
Roll a little bit of white roving between your fingers and stab into place over the toadstool tops.

To add writing, take a long, thin piece of roving and roll it between your fingers into a thin line. Place into shape and use a fine felting needle to stab into place.


To create the butterfly, get a small piece of roving as in the above picture. I used two colours. Roll the roving into a ball and place on your felting pad. Stab into shape. I used the finer needle down the middle to create shape.  Remember that the more you felt something, the more the fibres mesh together and shrinks in size. Get a small piece (a few strands) of black.  Roll between  your fingers to create a line and place over the middle of the butterfly; stab into place using a fine needle.
Once you have created your butterfly, place on your base and stab into place.
The dragonfly was created by mixing a bit of sparkly non bondable Angelina with wool roving, shaping into thin lines and stabbing into place.

I hope this has helped to inspire you to have a go at felting if you haven't already.

You can find my other needlefelting tutorials here...
 Felted Balls