Showing posts with label beads. Show all posts

Tuesday, 13 December 2016

DIY Bead and Wire Christmas Ornaments

 I love beads but I have not had much experience in using beads.  But somehow I have seemed to have acquired a collection of all sorts of coloured beads, large, small, plastic, glass... I am a bit like a magpie and am attracted to sparkly things.  I find beads at op-shops, and people also give me beads, and my bead collection has grown quite a bit!  But as I am not really a jewellery maker, I needed to find other uses for them.  These Christmas decorations are fun to make and look fabulous.

You will need:
Wire.  I don't know what gauge I used, but I used a wire strong enough to hold the shape; and a fine wire (about 24-26 gauge) for threading beads on and wrapping around the wire shape. 

A selection of coloured beads

Pliers
Wire Cutters

Bend your thick wire into your required shape, and bend around again so that you have two sides. (See picture below). Snip your wire.  You do not need to attach the ends but you might like to twist them together to create a join.

Some possible ideas for wire shapes...  Cross; Heart; Anchor; Star.
 
Cut a length of fine wire. Wrap one end of the wire a couple of times around the wire where you have joined it together, to secure it.
Begin threading a selection of coloured beads onto the wire and wrap it around your wire shape as you go. 

(Back of wire heart shaped ornament)

Continue adding beads and wrapping around the wire shape.  If your length of wire is too short, simply wrap the end around the wire shape and cut another length of wire and continue, adding beads and wrap around your wire shape.  Continue until you have finished wrapping beads around your shape.

Attach a piece of thread to the top of your ornament and it is ready to hang on the tree.
 Wire and Bead cross.
 The back of the wire and bead cross. You can see where I have wrapped the thin copper wire around and around the wire shape.
 A bead and wire cross.
A wire and bead cross

 Back of the cross
 Front of the cross.


Some other ideas for making wire and bead ornaments... 
Memory wire, red and blue glass and plastic beads, and a little sailboat.


Beads threaded onto wire, with ends joined together and bent into a star shape.

Monday, 12 December 2016

DIY Felt Christmas Ornaments

 I love working with felt - you don't need to hem it, it doesn't fray, it is soft and so versatile and lends itself to so many different crafts.  These felt ornaments are worth the time and effort that you spend making them and they look gorgeous year after year. 
 You will need:
Felt.  I use a mix of acrylic and wool felt - it all depends on your preference, your budget and the colours you want to use.
Thread.  I used embroidery thread - you can find such a range of embroidery threads: metallic, sparkly, etc.
Beads / sequins
Ribbon / Ric rac.
Anything else you think of that takes your fancy, eg. buttons, embellishments, old jewellery etc.
 Step 1
Create a template.  I know, I mention this ALL the time.  But your template is crucial.  It also means you can make it again and again.  I love using empty cereal packets for card templates; Acetate works fantastically for plastic templates.  

Practise drawing the ornament shapes you want on a plain piece of photocopy paper or a refill pad. I used traditional ornament shapes -  a circular ornmaent; a tear drop shape; a star shape; a heart shape; and a triangle shape (to represent a tree).

Cut out and transfer your design to an empty cereal packet or piece of clear acetate/plastic.  Cut out.

On your felt, draw around your template x 2.  You might like to do both sides the same colour, or make each side a different colour.  

Cut out.
Embellish either one side or both sides of your felt shapes with beads, lace, ribbon sequins, strips of coloured felt, ric- rac, etc.  

The tree above was decorated using old broken jewellery. 

 The star uses two different sizes and two different colours.
 Cut out a small piece of felt for the top of the ornament x 2.
Cut a length of ribbon for hanging.

Put the two sides of your ornament together;
Sandwich the ribbon in the middle, at the top of your ornament;
Pin the little top pieces of felt to the top of your ornament.

Sew the two pieces of felt together, Leave a gap for stuffing; fill with stuffing; sew up the gap.
Note: It is completely up to you how much stuffing you use.  It is your own preference.  I like to use a little bit of stuffing to give a bit of shape.  You might like to keep it flat like the above ornament.  Or you might like to fill it out a little bit.  There is no right or wrong.
 Felt circular shaped ornament, with white and purple strips of felt, pale purple ric-rac; metallic embroidery thread; purple felt for the top of the ornament and pink ribbon for hanging.
 Pink wool felt; blue felt; ric rac; beads; glossy embroidery thread; pink ribbon for hanging.
Pale purple acrylic felt; strip of white felt; strip of pale pink felt; ric-rac; sparkly embroidery thread; beads; dark pink felt and pink ribbon for hanging.

Friday, 7 October 2016

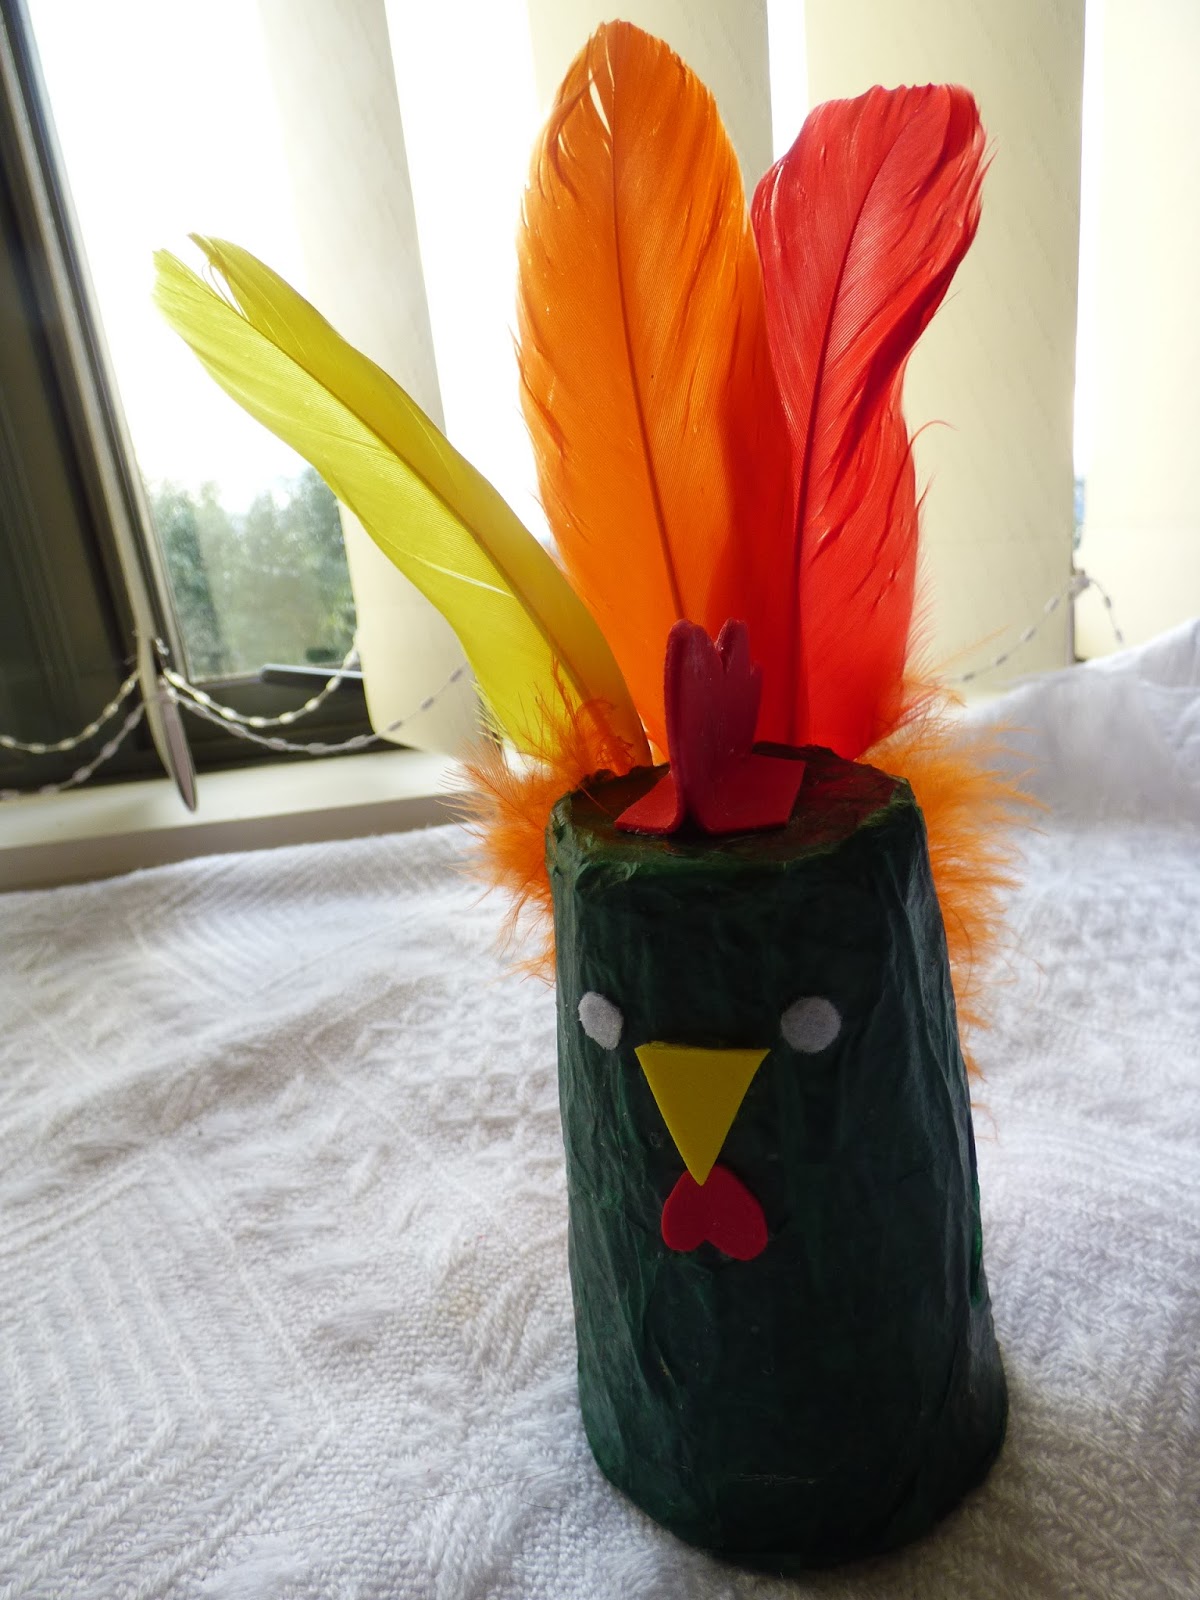
The rooster and the sultan: 100 Days Project - mat time resources

I came across this story on this blog post by Evelyn Davis... The Sultan and the Magic Rooster. and was inspired to tell the story and create characters for telling the story.
I decided to papier-mâché the characters, using plastic cups as the base, as they are firm, and I had them sitting in my craft room waiting for a project. I covered the cups in masking tape first, to give a base to adhere the glue and paper to, as glue and paper will not stick to plastic.
I covered the cup completely in masking tape with several strips over the top of the cup.
I used layers of tissue paper and watered down PVA glue, applying a couple of layers and letting them dry before carrying on the next day.
Plastic cups covered in their first layer of tissue paper and PVA glue.
One dry and one wet cup.

After applying a number of layers of white tissue paper, I began using coloured tissue paper.
Paper cups in progress.
Wet papier-mâché cups drying. I applied several more layers of coloured tissue paper to each cup.
Dry papier-mâché cups ready for the next stage.
I used craft foam for the roosters beak and wattle. I cut out two pieces of red foam with a bit of extra length for folding. I applied glue to the inside of the two pieces of red foam, stuck them together and folded up the bottom part, to creat a base to adhere to the cup. I used a bulldog clip to hold it fast while it dried.
I cut up cream tissue paper into circles and glued on several layers to each cup for the faces. I ended up painting over them using a mix of orange and white paint to create a flesh colour.
I glued feathers onto the back of the rooster. I used a tacky craft glue, and used an elastic band around the feathers and cup to hold them in place while they dried.
The sultan, the old lady, and the servants... Starting to apply details using paint for hands, and black sharpie for faces and arms.
I used scraps of fabric to create headgear, as i think Turkish people often wear headgear.

A bit of lace added for the old lady.
The completed rooster.
The Sultan of Turkey. I used gold outliner paint to add details as I wanted him to look rich.
 
A bit of yellow edging ribbon for the old lady's head.
The old lady, the rooster, the sultan, and his three servants.


Click on the link for more of my teaching resources

Friday, 26 August 2016

Fidget bracelets


I got the idea for these after 2-3 incidents over the past year where children sitting on the mat listening to a story have picked up something they found on the floor and put it up their nose or in their mouth. I have a friend who wears 'Stimming Jewellery' - jewellery cleverly designed for people who stim, such as those with autism and other learning needs, and also those who need to constantly fiddle with something in order to pay attention. I know from my own experience that having something in my hand to play with does not detract my attention from listening to others, but it is quite soothing and almost obsessively sensual.

So I decided to try making something that children can fiddle with quietly while we have mat time. There are some children who struggle to sit still, while others have trouble paying attention to a story. These fidget bracelets will hopefully help to support those children who need to move or be doing something, and hopefully stop them peeling and unpeeling the velcro straps off their shoes (velcro is so noisy!) and prevent them from picking up random things off the floor and putting it up their nose.

One of our parents kindly donated lots of ribbon to our centre, so I cut lengths of ribbon and laid out a variety of large wooden rings and bits with holes in them and plastic beads. Children threaded 1-3 rings or beads on a length of ribbon and I fastened them with a reef knot. They are too big to go into noses or ears, and too big to be swallowed. Having only one or two beads means they are not going to make an irritating clicking sound, and using wide ribbon makes it easy to hold, slows the beads down and requires you to purposefully push them around the length of ribbon.

I also gathered up some beanbags and a koosh ball and placed them in a teachers basket together with the fiddle bracelets to be given out to children who have trouble paying attention at mat time. I explain to the tamariki that these bracelets are to help them concentrate and focus at mat time - if it distracts them, then it is not suitable for them. After mat time, those that have got one can return them to the basket before going to wash their hands.

For those that are wondering about how fair it is to give one child a fidget bracelet but not another... fairness is not about everyone having the same thing, but allowing everyone to be on the same playing field - in other words, giving those that need it the tools they require to be at the same level as the others. When I was completing my Bachelor of Education, I made good use of the library at the University Campus, and got out many books on teaching, even though they were not part of my required reading for the courses I was doing. I found that I just loved learning more and more, and I read voraciously on things that interested me. One book I got out on teaching children with diverse needs explained the concept of fairness as three children of different height, all asked to reach a button on the wall. The tallest can do it easily; the middle one can do it if she stands on her tiptoes; the smallest can't reach at all. Fairness is giving the small one a stepladder to stand on, so he can reach it too. At mat time, there are children who are easily able to pay attention, to sit still, and to listen. But there are also children who find it challenging. Fairness is giving them the tools they need to be able to listen too, so that they don't miss out on learning.

Sunday, 30 August 2015

100 Days of Christmas - felt stocking ornaments

These cute little stocking ornaments are suitable for children aged 7+ to create, especially if they have already been introduced to simple sewing.

You will need:
acetate or scrap cardboard to create a stocking pattern to trace around
felt
pencil
scissors
needle
thread
sequins, beads or buttons to decorate
safety pin or pins
ribbon for hanging

NB: If you are using small beads, you will need to use a small needle that can fit through the beads.

Draw a stocking shape on acetate or card.  Cut out. This is your stencil.

Fold your felt in half, Place the stocking stencil on the felt and draw around lightly in pencil. Use the safety pin or pins to fasten the two sides of the felt together.  Cut out the stocking shape - you should now have two stocking pieces.

Thread your needle and tie a knot in one end. Thread through one of the stockings, and begin attaching beads, sequins and buttons to it. When you have decorated it as much or as little as you like, place on top of the other stocking shape (right side facing up).  Match up the edges, and use a simple overhand stitch around the sides to join it together. I decided to leave the top free, so that I could put something into it if I wished.

When finished, attach a loop of ribbon to hang it up with.

Feel free to post photos of your stockings - I love to see what other people create!

Saturday, 22 August 2015

100 Days of Christmas... a beaded star garland

For the last two years, I have participated in the 100 Days Project.  In fact, that is how Needle Felted Fairytales came about - because for my first 100 Days Project, I decided to needlefelt something every day for 100 days.  This year, it was meant to kick off in July, but due to website delays, it hasn't started yet - so I am doing it anyway.  Last year I wrote a children's book; this year I am doing 100 Days of Christmas, because I love Christmas, and every one of my Christmas decorations is handmade. Each year I take part in a Christmas Decoration swap, and last year I found that by the time I had finished my 100 Days Project, I didn't have much time to make decorations.  So this year, I should be sorted!

My first decoration is a Christmas star garland.  I have had these beautiful Christmas fabrics sitting in my fabric box for the past few years, unsure of what to do with them.  I came up with this project to help showcase these beautiful fabrics.

You will need:
Fabric and backing fabric
Thread
Filling
Buttons
Beads

I made a star template on a scrap piece of card (empty cereal boxes are great for making templates), and drew around it onto the fabrics (and also onto a backing fabric).  I sewed them together, leaving a gap to stuff with a little bit of filling. Don't overfill them. (I used a sewing machine to sew the stars together, but you could also handsew them too).


I then sewed up the gap, and topped the star with a button in the middle.


After making a number of stars, I brought out my stash of beads, and began to join the stars together with beads, using a needle and thread.  This was the fun part! This is a great way to use those beads that you don't know what to do with.

You could make this garland using any basic shape, such as hearts, or circles.  You could alternate the stars with hearts, or make a garland with just hearts, which could then be used on Valentines Day, birthdays, and Easter.